

Pretty Damn Good White Rolls
The rule of internet recipes is that you blither for 500 words before you get to the recipe. Also that you claim it makes the greatest whatever ever. This one doesn’t–someone somewhere has a better recipe using a trick I don’t know–but it will give you rolls with a damn good texture. The trick is to let the yeast get to work before you mix in the salt and to give it plenty of time.
Start the rolls several hours–or better yet the night before–you plan to make the dough.
White Rolls
500 grams bread flour *
2 tsp dry yeast
200 ml water or sourdough starter
1½ tsp salt
Up to 500 ml water
* In American, 500 grams of flour is 3 cups plus 2 Tbsp, or so Lord Google tells me. I bake bilingually, but do not, under any circumstances, trust me to translate between British and American baking languages.
Make a well in the center of the flour and add the yeast and either the 200 ml of water or the sourdough starter. If you’re using dry (as opposed to instant dry) yeast, let it sit around for 10 minutes or so, getting to know and love the water. (If your yeast container tells you to add sugar at this point, ignore it. The flour will feed the yeast perfectly well.) Stir a bit of flour into the yeasty water to make a wet paste. Flip a bit of flour over it, cover the bowl, and leave it for at least a couple of hours, or overnight if possible.
Add the salt and most of the remaining water and mix everything together. You want a fairly dry dough, so don’t toss all the water in at once. If you can get away without some of it, do. If the dough’s too wet, your rolls won’t hold their shape. They’ll taste fine but they’ll run into each other.
Because the yeast has been working for a while, gluten will have formed and the dough will have a lot of texture. Translation: It won’t be easy to work in the rest of the flour. Toward the end of the mixing, I usually end up using my hands to pull, tear, turn, and squish.
Knead the dough for about 10 minutes if you’re doing it by hand. In a kitchen mixer with a dough hook, that’s about 5 minutes at a speed setting of 3. Please understand that the kitchen mixer timing and setting are entirely random, but they work. I’m sure any number of others would be just as good.
Rub a bit of oil on top of the dough, cover it, and let it rise. How long? It’ll depend on the temperature of your kitchen. The lower the temperature, the slower the rise, and a slow rise means more texture. Don’t worry about letting it rise too long. The worst it’ll do is collapse in on itself, in which case you just punch it down and shape it into rolls. As long as the yeast has something to feed on, it’ll be fine. If I have time, I sometimes punch the dough down and let it rise a second time, or even a third. The later risings will be faster than the first.
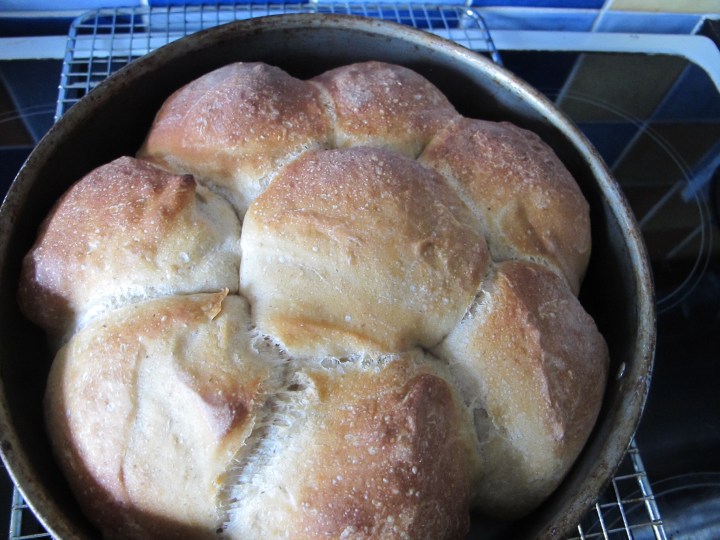
Divide the dough into eight pieces and shape each into a ball.
I like to bake these in an oiled springform cake pan (put one roll in the center and seven in a circle around it), but you could also bake them in a square pan or on a cookie sheet (see below for timing). If you have baking paper (or greaseproof paper, which may or may not be the same thing), line the bottom of your pan with it. It’ll keep the rolls from sticking.
Cover and let them rise again. How long? Again, it’ll depend on your kitchen temperature. Until they’re visibly bigger. Until you get bored. Until your oven’s hot.
Bake 35 minutes at 180 C. if you’re using a fan oven, at 200 C. in a regular oven, or at 400 F. if you speak American.
Notes:
One. If you bake the rolls on a cookie sheet and they aren’t nestled up against each other, you may need less baking time because the heat will move between them. Try 20 to 25 minutes, then tap on the bottom of one. If you get a nice drumlike sound, it’s done. If you don’t, give it a little more time.
Two. If you’re used to using warm water when you make bread, don’t. Warm water makes the dough rise more quickly. That’s good if you’re in a hurry, but it doesn’t give you as stretchy a texture.
Three. I’m old enough to remember when cookbooks said to cover dough with a damp cloth. I recycle plastic freezer bags for this. They don’t stick to the dough too badly.
Four: I tend to double the recipe and bake two pans at once. They freeze well.
Five: For a crustier version, put an empty pan on the bottom shelf when you turn on the oven and set the temperature 10 or 20 degrees higher than the temperature you’ll use. When the oven’s heated, pour an inch or two of boiling water into the pan as quickly as you can manage. This adds steam to the oven and crisps the crust. Turn the temperature down and put the rolls in.
***
Ellen Hawley is an American living in Britain. She blogs at Notes from the UK.Her novels are The Divorce Diet (Kensington, 2015), Open Line (Coffee House, 2008), and Trip Sheets (Milkweed Editions, 1998).
*
Editorial comment: Man, I love Ellen’s bonus tips! Especially the one about not needing warm water in the yeast. I can’t tell you how often I worried my water wasn’t the right temp and something bad would happen to my bread, lol. Thanks, Ellen!


They look yummy!
LikeLiked by 2 people
They sure do and I’m going to give it a go!
LikeLiked by 1 person
…and now, of course, I see the bits I should have edited….
LikeLike
Bah! 😊
LikeLiked by 1 person
Reblogged this on Notes from the U.K. and commented:
Charlotte Hamrick, at Zouxzoux: Poetry, Prose, Photography, has added a series on writers who bake. And since this recipe’s mine, I’m just vain enough to reblog it.
The site’s well worth exploring.
LikeLiked by 2 people
Good tip about the water temp…I use cheap shower caps to cover the dough they work brilliantly as does a plastic bag as per your idea:)
LikeLiked by 1 person
Might have a crack at this one day. But not today as I’m part-way into proofing another loaf of sour dough and have an on-line funeral in a couple of hours. That’s a lot for my brain to cope with. But thanks, Ellen.
LikeLiked by 2 people
What strange times these are. Sending my thoughts.
LikeLiked by 1 person
Thank you. Yes, very strange days, indeed.”Mos’ peculiar, Momma.”
LikeLiked by 1 person
These look delicious! My mom is in for the Holidays and we love to try new recipes. We will definitely be giving this one a go. :)
LikeLiked by 2 people
These look great, like the one’s mom used to make. Thanks!
LikeLiked by 2 people